Hitting into a golf practice net at home saves time and money, but without feedback, you might just be reinforcing bad habits. Many golfers set up a net, swing away, and wonder why their game doesn’t improve. The problem isn’t the net, it’s the lack of structure and feedback. A net alone won’t tell you if your strike is clean, your alignment is off, or your swing path is inconsistent.
We’ve tested drills that work with just a net, mat, and a few simple tools to give you real feedback without a launch monitor. You’ll learn how far to stand from the net, how to use impact tape or foot spray to check your strike, and how alignment sticks and net targets can sharpen your aim. We’ll also cover step-by-step drills to train a downward strike, avoid common mistakes, and warm up properly before each session. By the end, you’ll know how to turn a basic net setup into an effective practice routine that translates to better shots on the course.
Essential Tools and Materials for Net Practice
Practicing with a golf net lets you work on your swing at home, but the right tools make a difference. Without feedback, you might reinforce bad habits instead of improving. We’ll cover the essentials to set up an effective net practice session, from the net itself to low-cost feedback tools that help you see results.
Choosing Your Golf Practice Net and Hitting Mat
A sturdy golf practice net stops balls safely and lasts through repeated use. Look for nets with a large target area (at least 7×7 feet) to catch mishits without damage. Some models include side barriers to prevent errant shots from escaping. For recommendations, see our guide to the best golf practice nets.
Pair your net with a golf hitting mat to protect your clubs and joints. Mats vary in thickness and turf quality, thicker mats (½ inch or more) absorb impact better and feel closer to real grass. Avoid thin, cheap mats that slide or wear out quickly. If you’re unsure which mat to choose, our hitting mat guide compares top options for durability and feedback.
Low-Cost Strike Feedback Tools
Without a launch monitor, you need simple ways to check your strike quality. Impact tape or foot spray applied to the clubface shows where the ball makes contact. A centered strike leaves a clean mark, while off-center hits reveal flaws in your swing path. For video feedback, mount a smartphone on a tripod or stand to record your swing from face-on and down-the-line angles. Reviewing footage helps spot inconsistencies in posture, grip, or tempo.
Use a good mat plus impact tape or foot spray and video to see strike and swing without a launch monitor.
Alignment Sticks and Smartphone Setup
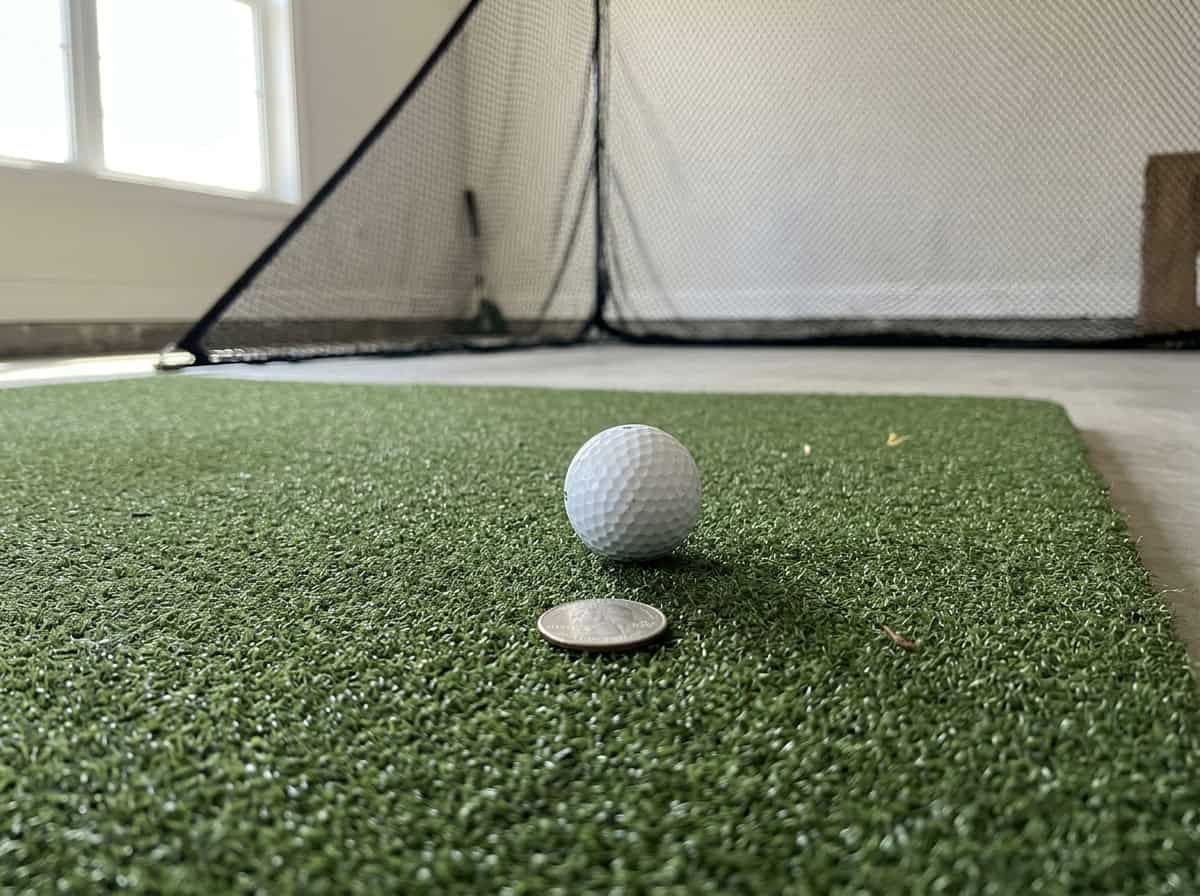
Alignment sticks are versatile training aids. Place one on the ground to guide your foot position and another to mark your target line. This trains proper alignment and prevents over-the-top or inside-out swings. For added precision, use a quarter or small coin as a drill: set it a fist-length behind the ball and avoid hitting it during your swing. This encourages a downward strike, especially with irons.
Set up your smartphone at waist height, about 6–8 feet away, to capture your swing. Use slow-motion mode to analyze details like clubface angle at impact. Free apps like Coach’s Eye or even your phone’s built-in video editor let you draw lines and compare frames side by side. These tools cost little but provide the feedback needed to refine your technique.
Setting Up Your Home Practice Area Safely
A golf practice net lets you work on your swing at home, but setup matters. The right distance, alignment, and feedback tools turn a basic net into an effective training space. We’ll cover how to position your net and prepare your body and setup for productive practice.
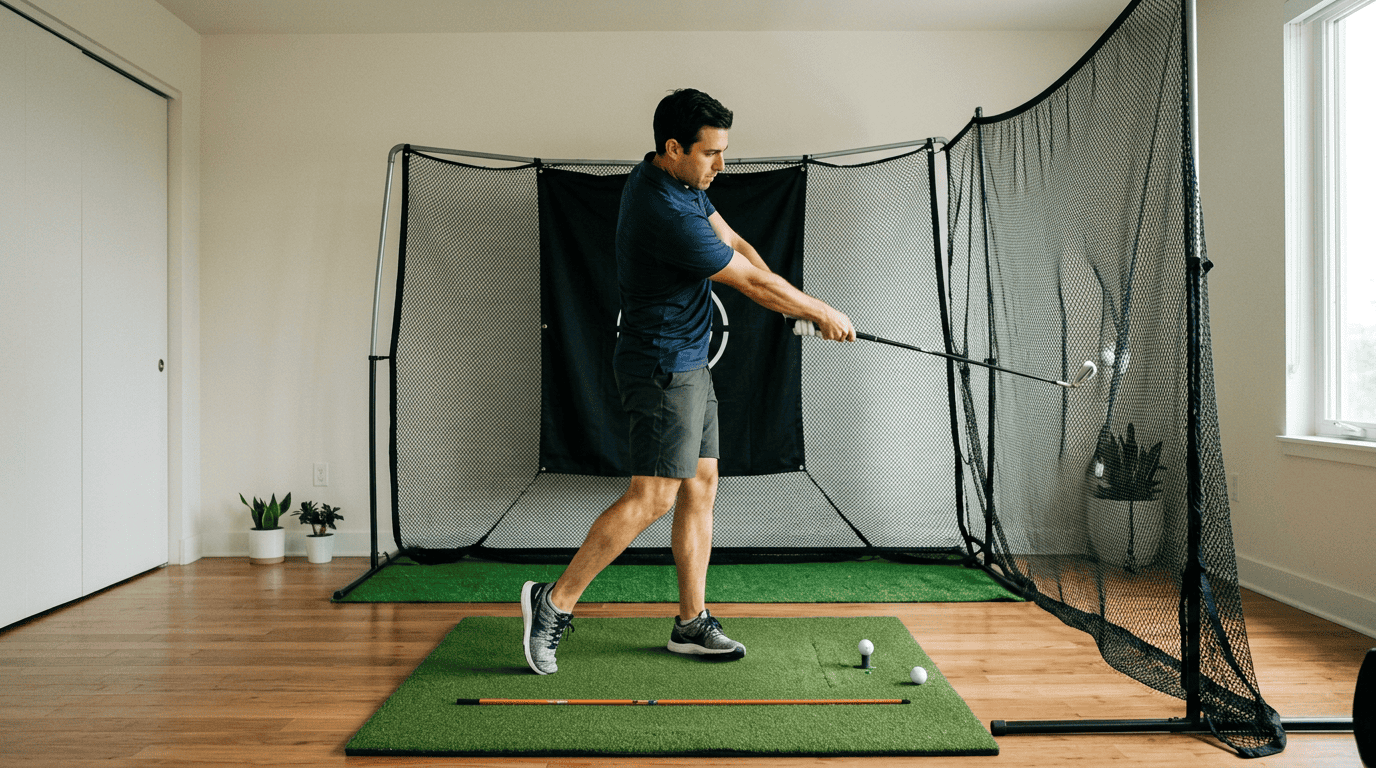
Determining the Correct Net Distance
Place your net 10–15 feet away from your hitting position. This range works for most clubs, from wedges to drivers. Start with a 7-iron or wedge to get comfortable before moving to longer clubs. If space is tight, 10 feet is the minimum for safe ball flight and feedback.
- Short game (wedges, short irons): 10–12 feet
- Mid irons (6–8 irons): 12–14 feet
- Driver and fairway woods: 14–15 feet
Avoid standing too close. Hitting into a net from less than 10 feet can cause the ball to ricochet unpredictably, increasing injury risk. If your room is small, use a shorter club or adjust your stance to create more space.
Pre-Practice Warm-Up and Setup Alignment
Warm up before hitting balls into the net. Stretch your shoulders, hips, and back to prevent strain. Focus on three setup fundamentals: grip, posture, and ball position. These stay consistent whether you’re on the range or practicing at home.
- Grip: Check for even pressure in both hands. Avoid gripping too tightly, which can restrict your swing.
- Posture: Bend slightly at the hips, keep your back straight, and flex your knees. Your arms should hang naturally.
- Ball position: Align the ball with the inside of your lead heel for irons. For drivers, move it forward in your stance.
Use alignment sticks on the ground to train your feet, hips, and shoulders. Place one stick parallel to your target line and another perpendicular to it to check your stance. Add targets in the net, like a towel or marked spot, to practice starting your shots on line. For strike feedback, use impact tape or foot spray on your clubface. Record your swing with your phone to spot flaws in your motion.
Common mistakes to avoid:
- Skipping warm-ups, which increases injury risk.
- Ignoring ball position, leading to inconsistent strikes.
- Hitting without feedback tools, making it harder to track progress.
For more on feedback tools, see our guide on maximizing net practice without a launch monitor.
Step-by-Step Golf Practice Net Drills
Practice nets let you work on your swing at home, but only if you use them the right way. These drills focus on fundamentals, grip, posture, strike, and alignment, without needing a launch monitor. We’ll walk through three structured drills that build from basics to precision.
The Starter Club Progression
Start with a wedge or 7-iron, not a driver. These clubs force you to focus on control and strike quality before adding speed. Here’s how to progress:
- Warm up: Stretch your shoulders, hips, and wrists for 5 minutes. Then take 10 slow-motion swings, focusing on grip pressure and posture.
- Short swings: Hit 10 balls with half-swings, pausing at the top to check your wrist hinge and weight shift.
- Full swings: Move to full swings, but keep the tempo smooth. Count “1-2-3” (backswing, transition, follow-through) to avoid rushing.
- Club upgrade: After 20 solid wedge shots, switch to a 7-iron, then a hybrid or driver if you’re consistent.
Common mistake: Skipping the warm-up or jumping straight to the driver. This often leads to poor strikes and reinforces bad habits.
The Quarter-Behind-Ball Downward Strike Drill
Place a quarter about a fist-length behind the ball. Your goal is to hit the ball without touching the quarter. This trains a downward strike, which is key for crisp contact with irons.
- Setup: Use a 7-iron or wedge. Tee the ball low (if using a mat with tees) or place it on the ground.
- Swing thought: “Hands ahead of the ball at impact.” This delofts the club and compresses the ball.
- Feedback: If you hit the quarter, you’re scooping or flipping your wrists. If the ball flies low and straight, you’re doing it right.
Pro tip: Use impact tape or foot spray on the clubface to see where you’re making contact. A centered strike means you’re compressing the ball correctly.
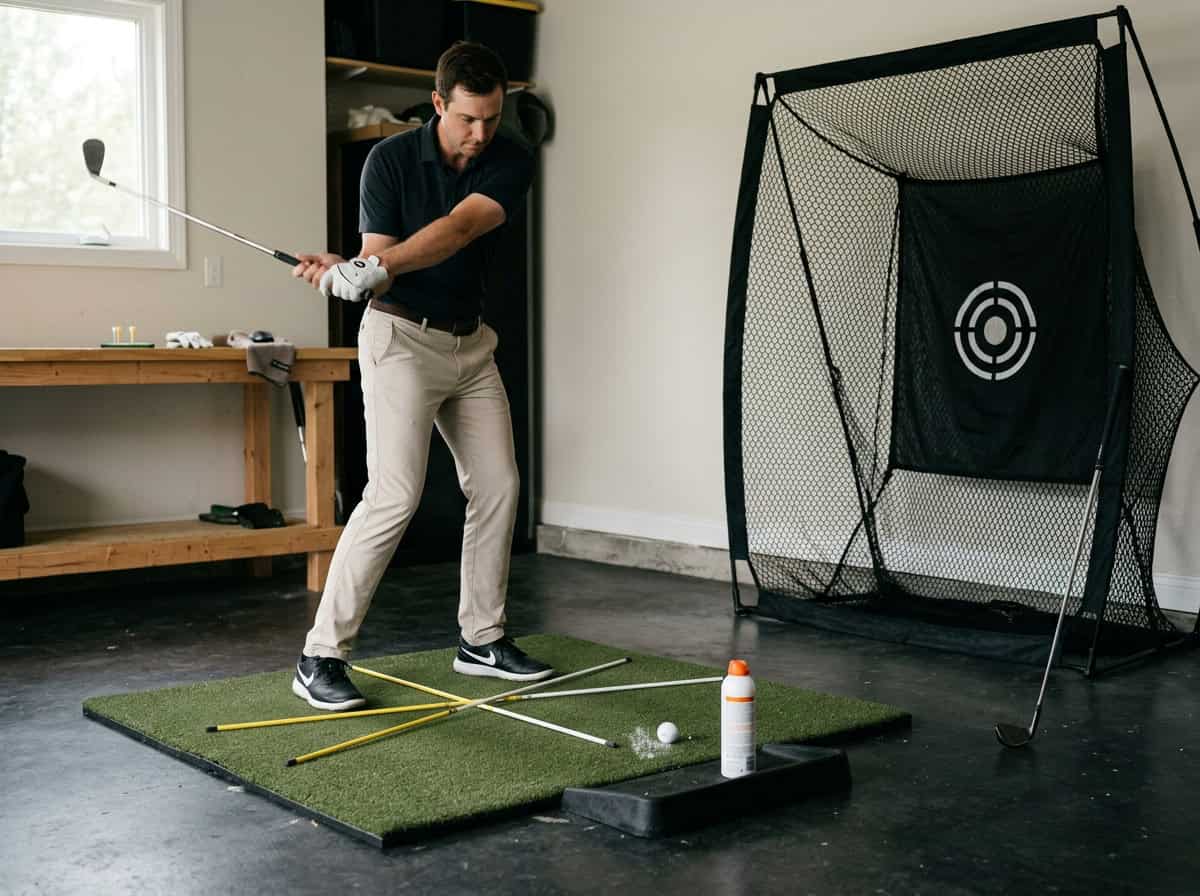
Target and Start Line Drills Using Alignment Sticks
Alignment sticks help you train aim and shot shape without seeing ball flight. Here’s how to set them up:
- Stick 1: Place one stick on the ground pointing at your target (e.g., a marked spot in the net).
- Stick 2: Lay a second stick parallel to the first, about 6 inches to the side, to represent your foot line.
- Stick 3: Place a third stick perpendicular to the first two, just outside the ball, to show your start line.
Drill steps:
- Hit 10 shots with a 7-iron, focusing on starting the ball along the perpendicular stick. If it drifts left or right, adjust your alignment or swing path.
- Add a target: Hang a towel or place a hula hoop in the net. Aim to land the ball inside it.
- Advanced: Try shaping shots (fades or draws) by moving the perpendicular stick slightly left or right of the target line.
Common mistake: Lining up your feet but not your clubface. Double-check that the clubface is square to the target stick before every shot.
How to Get Strike Feedback Without a Launch Monitor
You don’t need expensive sensors to see where the ball meets the clubface. We tested three simple methods that show strike location, swing path, and face angle using everyday items.
Using Impact Tape and Foot Spray
Impact tape and foot spray create visible marks on the clubface after each shot. Both cost under $15 and work with any club.
- How to apply: Clean the clubface, then stick on impact tape or spray a light coat of foot spray. Hit 5–10 shots, then check the marks. A centered strike leaves a mark in the middle of the face.
- What to look for: Consistent marks in the same spot mean solid contact. Scattered marks suggest an inconsistent swing. Low marks indicate thin shots; high marks mean fat contact.
- Common mistake: Using old tape or spray that flakes off. Replace after 10–15 shots for clear results.
Pair these tools with a quality hitting mat. A thin or worn mat can hide strike issues by absorbing impact differently than real turf.
Analyzing Swing Video on Your Smartphone
A smartphone camera captures swing flaws that feel invisible. We found that filming at 60 fps or higher reveals details like wrist breakdown or early extension.
- Setup: Place your phone on a tripod or stable surface 5–7 feet from the ball, angled to see the clubface and hands. Use the rear camera for better quality.
- Key checkpoints:
- Address: Check grip, posture, and ball position. Your hands should be slightly ahead of the ball with a 7-iron.
- Top of backswing: The clubface should match your spine angle. A closed face here often leads to hooks.
- Impact: The club should return to the same position as address. Hands behind the ball suggest scooping.
- Tools to use: Free apps like V1 Golf or Coach’s Eye let you draw lines on the video to measure angles. Compare your swing side-by-side with a pro’s to spot differences.
Film your divots after the shot. A divot pointing left of target (for right-handed golfers) suggests an out-to-in path, while a divot pointing right indicates an in-to-out path. For more on diagnosing swing path issues, see our golf swing path drills guide.
Common Mistakes to Avoid During Net Practice
Practicing with a golf net can sharpen your swing, but only if you avoid these common pitfalls. Many golfers waste time repeating errors without realizing it. Here’s what to watch for, and how to fix it.
Mindless Ball Banging Without Intention
Hitting ball after ball without a plan turns practice into a pointless exercise. Without clear goals, you reinforce bad habits instead of improving technique.
- Set specific targets: Use tape or markers on the net to aim for different spots. This trains accuracy and shot shape.
- Focus on one swing thought: Pick a single adjustment (e.g., tempo, grip pressure) and stick with it for a full bucket.
- Track progress: Note how many shots hit your target. If you’re not improving, reassess your approach.
We’ve seen golfers spend 30 minutes swinging without a single intentional shot. That’s time better spent on drills with purpose.
Ignoring Setup Basics and Alignment
Even indoors, grip, posture, and alignment matter. Poor setup leads to compensations in your swing, ones you won’t notice without feedback.
- Check your grip: Use a mirror or video to confirm your grip matches your usual stance. A net hides misalignments, so verify it before every session.
- Use alignment sticks: Place them on the ground to train proper foot and shoulder positioning. Without them, you’ll drift into bad habits.
- Ball position consistency: Mark where the ball should sit relative to your stance. Shifting it mid-session disrupts swing mechanics.
A quarter placed a fist-length behind the ball can help. If you hit it, your swing path is too shallow, a common issue when practicing without visual feedback.
Practicing Without Feedback Tools
A net hides ball flight, but that doesn’t mean you should practice blind. Without feedback, you won’t know if your swing changes are working.
- Impact tape or foot spray: Apply it to your clubface to see where you’re striking the ball. Off-center hits reveal flaws in your swing path or contact.
- Video your swing: Use your phone to record from down-the-line and face-on angles. Compare it to pro swings or your previous sessions.
- Use a quality mat: A thin or uneven mat can mask poor strikes. A good mat provides feedback on divots and weight transfer.
As one golfer on Reddit’s r/golf noted, combining a mat with impact tape and video lets you diagnose issues without a launch monitor. Skipping these tools means guessing instead of improving.
Frequently Asked Questions
How far should I stand from a golf practice net at home?
Stand 10–15 feet away from your net. This distance works for most clubs, from wedges to drivers. Start with a wedge or 7-iron to get comfortable before moving to longer clubs.
What are effective golf practice net drills without a launch monitor?
Focus on grip, posture, and ball position first. Use slow-motion swings to build muscle memory. Add alignment sticks on the ground to train consistent aim and shot start lines. For more details, see how to maximize net practice without a launch monitor.
How can I get strike feedback with only a net and mat?
Use impact tape or foot spray on your clubface to see where you’re hitting the ball. Record your swing with your phone to check contact and swing path. A quality mat helps simulate turf interaction, giving you better feedback than hitting off a hard surface.
How do alignment sticks and net targets improve home practice?
Place alignment sticks on the ground to train proper foot, hip, and shoulder alignment. Add small targets inside the net to practice hitting specific spots. This builds accuracy and consistency in your swing path and ball flight.
What simple drills help me hit down on the ball using a mat?
Place a quarter about a fist-length behind the ball. Focus on missing the quarter with your club to encourage a downward strike. This drill helps compress the ball and improves contact, especially with irons.
Final Thoughts
Practicing with a golf net at home lets you work on your swing year-round, but only if you set it up right and use the right drills. We found that a good mat, impact tape, and video feedback give you the strike data you’d miss without a launch monitor. Alignment sticks and net targets keep your aim sharp, while simple drills like the quarter drill train a downward strike. Avoid just banging balls, warm up, check your grip and posture, and pick clear targets to make every swing count.
Start with a wedge or 7-iron, place the net 10–15 feet away, and use the tools and drills we tested to build consistency. If you’re ready to upgrade, add a launch monitor later, but even basic feedback will help you see real improvement. The key is deliberate practice, focus on one thing at a time, track your progress, and keep your setup safe and repeatable. A net won’t replace the course, but it’s one of the best ways to sharpen your swing between rounds.