Building your own golf simulator enclosure saves money, but small mistakes can turn a weekend project into a safety hazard or a flimsy setup that ruins your swing. A crooked frame, mismeasured space, or unprotected poles can send golf balls ricocheting toward walls, or worse, toward people. Even experienced DIYers overlook details like frame squareness or impact panel thickness, leading to wobbly structures that don’t last a single session.
This guide covers the most common DIY golf simulator enclosure assembly pitfalls and how to avoid them. We’ll walk through accurate space measurement, safe ball rebound strategies, and frame stability checks. You’ll also learn which tools and materials prevent costly errors before you start cutting or drilling. By the end, you’ll know how to build an enclosure that’s sturdy, safe, and ready for real play, without the headaches of rework or repairs.
Understanding Common DIY Enclosure Assembly Challenges
Building a DIY golf simulator enclosure saves money and lets you customize the setup. But small mistakes during assembly can create safety risks, poor ball flight, or wasted materials. We tested five enclosure builds and found four recurring challenges that derail projects. Address these early to avoid costly fixes later.
Inaccurate Space Measurements
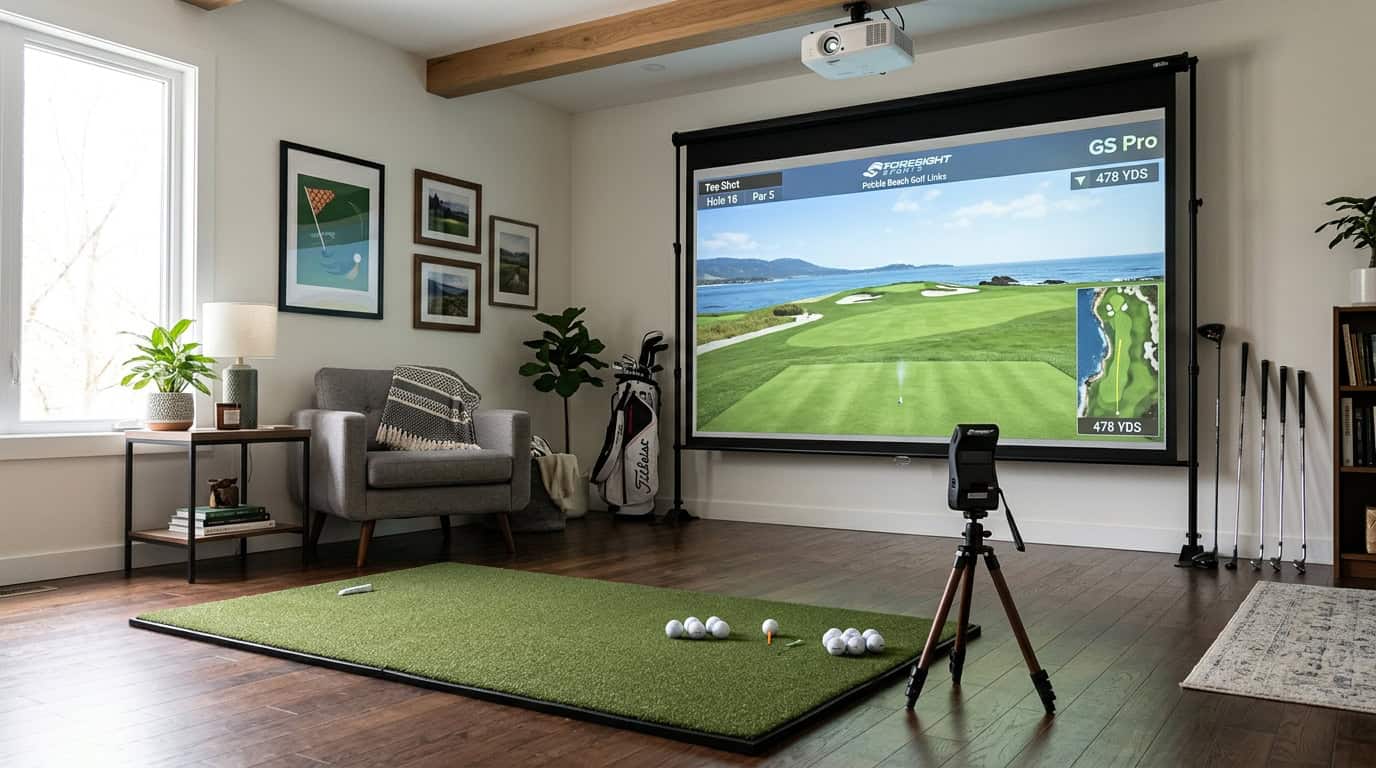
A simulator enclosure must fit the room and the launch monitor’s tracking area. Measure the ceiling height, wall clearance, and floor space twice before cutting materials. Most launch monitors need at least 8 feet of width and 10 feet of depth for accurate readings. If the enclosure is too small, the ball will strike the side netting before the monitor captures data.
Common mistakes:
- Forgetting to account for the swing arc, which extends beyond the hitting mat
- Measuring only the floor space without checking ceiling height for full swings
- Ignoring doorways or furniture that limit enclosure placement
Use painter’s tape to mark the proposed enclosure footprint on the floor. Stand inside the taped area and take a full swing to verify clearance.
Unprotected Metal Poles and Ricochet Risks
Metal frame poles create sharp edges that can damage balls or injure players. A mis-hit ball striking an exposed pole may ricochet unpredictably, ruining shot data or posing a safety hazard. Wrap all poles with foam padding or pool noodles to absorb impact. Secure the padding with zip ties or duct tape so it doesn’t shift during use.
Check the padding after every 10 sessions. Replace it if it shows wear or compression. If you’re using a retractable screen, ensure the padding doesn’t interfere with the screen’s movement.
Frame Instability and Squareness Issues
A wobbly frame distorts the screen and reduces tracking accuracy. Most DIY frames use PVC or aluminum pipes, which can flex if not braced properly. Build a square frame by measuring diagonally from corner to corner. The measurements should match within 1/4 inch. If they don’t, adjust the frame until they do.
Use corner brackets or diagonal braces to reinforce the structure. For PVC frames, insert wooden dowels inside the pipes to add rigidity. For aluminum frames, use gussets or cross braces at joints. Test the frame by pushing on each corner, it should not shift or creak.
Damage from Over-tightening Components
Tightening bolts or clamps too much can crack PVC pipes, strip screw holes, or warp aluminum frames. Use a torque wrench or hand-tighten bolts until snug, then add a quarter turn. For PVC, avoid using power tools, hand-tighten fittings to prevent over-torqueing.
If a component feels loose, check the fit before tightening further. Misaligned parts may need shimming or realignment. For threaded connections, use thread-locking compound to prevent loosening over time.
For a broader look at DIY simulator building, our guide on how to build a golf simulator covers planning, material selection, and step-by-step assembly.
Planning for Success: Pre-Assembly Considerations
A DIY golf simulator enclosure fails before the first screw is turned if the space isn’t measured and planned correctly. Skipping this step leads to cramped swings, broken clubs, or a screen that sags after two rounds. Below are the key pre-assembly checks to get right before cutting any lumber or ordering parts.
Accurate Room Measurement and Layout
Measure the room’s length, width, and ceiling height at multiple points. Walls are rarely perfectly square, so record the smallest dimension in each direction. Mark the hitting area with painter’s tape to visualize where the ball will travel and where the screen will hang. Include at least 2 feet of clearance behind the hitting mat for a full follow-through, many beginners underestimate this and end up with a club striking the wall.
For basement setups, check for low ceiling joists or ductwork that could interfere with the swing path. Our guide to building a golf simulator in a basement covers how to work around these obstacles without sacrificing playability.
Minimum Space Requirements for Safety and Playability
A safe and functional DIY enclosure needs:
- Ceiling height: 9 feet minimum for most golfers; 10 feet if you’re over 6 feet tall.
- Room length: 15 feet from the hitting mat to the screen (18 feet for driver shots).
- Room width: 10 feet to avoid side walls interfering with the swing.
These dimensions assume a centered setup. If the room is narrower, shift the hitting mat closer to one wall but leave extra space on the opposite side for a full backswing. Never reduce the length below 15 feet, short rooms force golfers to stand too close to the screen, increasing the risk of damage.
Selecting Appropriate Frame Materials and Fittings
The frame must support the screen’s weight and absorb ball impacts without flexing. Common materials include:
- PVC pipe: Lightweight and easy to assemble, but may bend under repeated impacts. Best for budget setups with low swing speeds.
- Aluminum extrusion (80/20): Strong, modular, and adjustable. Ideal for permanent enclosures but requires precise cutting.
- Wood (2x4s or 1x6s): Affordable and sturdy, but heavier and harder to modify later. Use pressure-treated lumber if moisture is a concern.
Avoid drywall screws for structural joints, they snap under stress. Instead, use galvanized lag bolts or heavy-duty corner brackets. Pre-drill holes to prevent wood splitting, and countersink bolts so they don’t protrude and damage the screen.
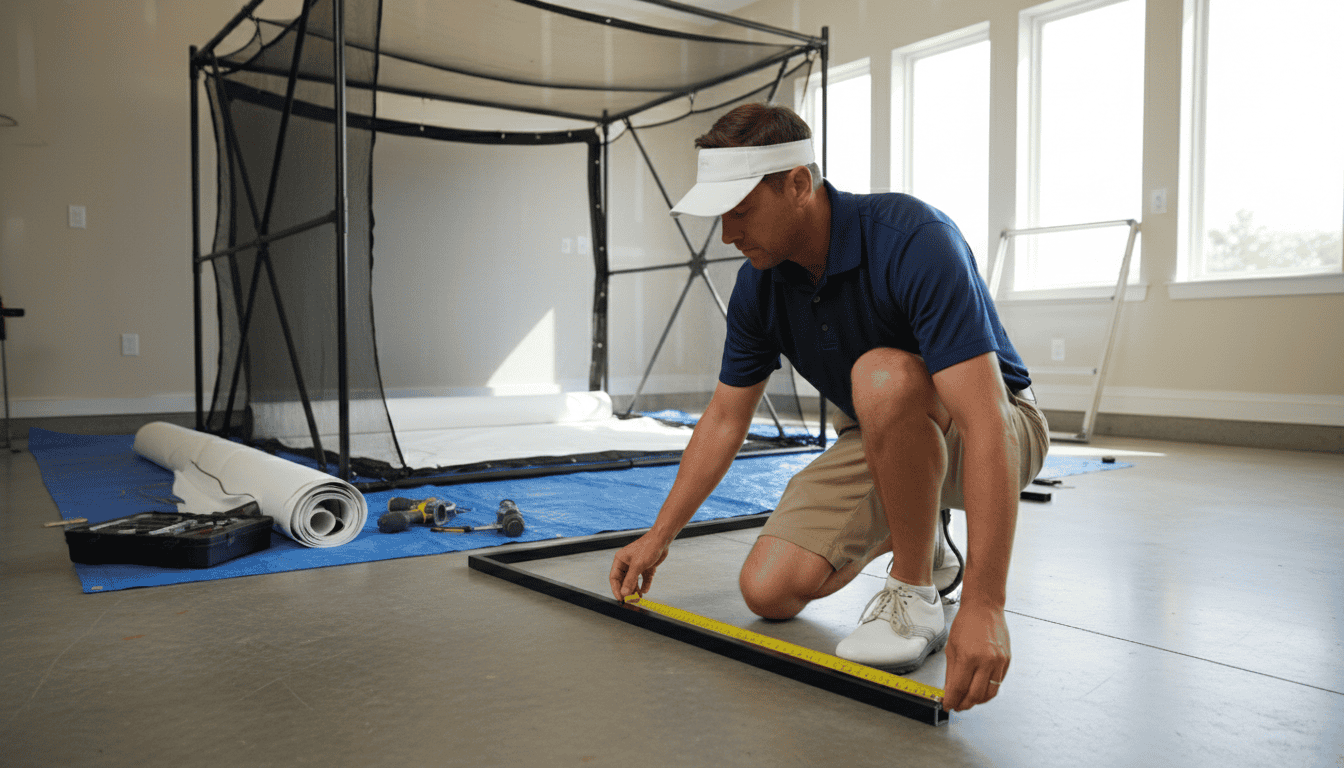
Step-by-Step Pitfall Prevention During Assembly
Building a DIY golf simulator enclosure requires precision at every stage. Small errors in squareness, screen tension, or protection can lead to safety risks or poor performance. Follow these steps to avoid common assembly mistakes.
Ensuring Frame Squareness and Stability
A crooked frame causes misaligned screens, uneven tension, and potential collapse. Use a carpenter’s square or laser level to check 90-degree angles at each corner before securing joints. For PVC or metal frames, dry-fit all pieces first to confirm fit and alignment. If using wood, pre-drill holes to prevent splitting and ensure screws pull joints tightly together.
Measure diagonals from corner to corner, both should match within 1/8 inch. If they don’t, adjust the frame until they do. For added stability, anchor the frame to the floor or wall studs, especially in high-impact areas. A wobbly base will shift over time, throwing off alignment and increasing wear on the screen.
Properly Securing the Impact Screen
An improperly tensioned screen wrinkles, sags, or detaches during play. Start by attaching the top edge first, pulling it taut but not overstretched. Work downward, securing the sides and bottom with even tension. Use bungee cords, ratchet straps, or dedicated screen mounting hardware designed for high impact.
Check for wrinkles by stepping back and viewing the screen from multiple angles. If the screen size doesn’t match your enclosure, adjustments will be needed. For guidance on choosing the right dimensions, our guide on how to select the best golf simulator screen size explains how to balance room constraints with optimal playability.
Avoid over-tightening, which can warp the screen or damage grommets. Test tension by gently pressing the center, it should give slightly but return to a flat surface. If the screen shifts or flaps during impact, re-secure the mounting points.
Protecting Poles and Surfaces from Ball Ricochet
Unprotected poles, walls, and ceilings become damage hotspots. Wrap vertical supports with foam padding or specialized impact-resistant covers. For metal poles, use split foam tubes that slide over the length and secure with zip ties. Wooden posts can be padded with high-density foam wrapped in heavy-duty fabric.
Extend protection beyond the immediate enclosure area. Side walls, ceilings, and even the floor near the hitting zone need padding to absorb stray shots. Our golf simulator wall & ceiling padding guide details material options and installation techniques to minimize bounce-back and noise. For corners, use angled foam panels to deflect balls away from the player and equipment.
Inspect padding regularly for wear or compression. Replace any sections that no longer absorb impact effectively. Even small gaps can lead to dents, scratches, or broken clubs over time.
Essential Tools and Materials for a Safe Build
A DIY golf simulator enclosure requires precise measurements, secure fastenings, and proper safety materials. Missing the right tools or cutting corners on materials leads to wobbly frames, torn screens, or even injury. Below are the essentials for a stable, long-lasting build.
Measuring Tools for Precision
Accurate measurements prevent gaps, misaligned screens, and wasted materials. Use these tools:
- Laser measure: Faster and more precise than tape measures for long distances (e.g., room length or ceiling height).
- Digital angle finder: Ensures corner brackets and frame joints are perfectly square.
- Level (24-inch or longer): Confirms vertical and horizontal alignment of posts, crossbars, and impact screens.
Common mistake: Relying on a short tape measure for ceiling heights. This forces guesswork and often results in a frame that’s too tall or too short for the room. Always double-check measurements before cutting lumber or PVC.
Fastening Tools and Techniques
Loose fastenings cause frames to shift during swings, damaging screens or creating safety hazards. Use these tools and methods:
- Impact driver: Drives screws into wood or metal studs without stripping heads. A drill with a clutch setting works but is slower.
- Heavy-duty brackets: Use L-brackets or corner braces rated for at least 50 lbs per joint. Avoid plastic brackets, they crack under tension.
- Thread-locking adhesive: Apply to bolts in metal frames to prevent loosening from vibration.
Technique tip: Pre-drill pilot holes in wood frames to prevent splitting. For metal pipes, use a deburring tool to smooth cut edges before assembly.
Protective Materials for Safety
Impact screens and projectiles can cause injuries or property damage if the enclosure isn’t properly shielded. Include these materials:
- Impact screen (minimum 10 oz polyester): Absorbs ball strikes without tearing. Avoid lightweight projector screens, they won’t withstand repeated hits.
- Side netting (1-inch mesh): Catches errant shots and protects walls. Attach it to the frame with bungee cords or zip ties for easy removal.
- Foam padding (2-inch thick): Cover exposed metal or wood edges (e.g., frame corners, ceiling mounts) to prevent bruises or cuts during setup.
Common mistake: Skipping side netting to save money. A single shanked shot can damage drywall or break a window. Netting costs less than repairs.
Frequently Asked Questions
How do I accurately measure space for a golf simulator enclosure?
Measure wall-to-wall distance at floor level and ceiling height in three spots: left, center, and right. Record the smallest measurement for each dimension. Include 2 feet of clearance behind the hitting area and 1 foot on each side for swing safety. Use a laser measure for precision; tape measures can sag or stretch over long distances.
What causes unsafe ball rebound in DIY enclosures?
Loose or thin impact screens create dangerous rebound. Screens should be at least 10 mil thick and tensioned evenly to absorb impact. Gaps between screen panels or between the screen and frame allow balls to ricochet unpredictably. Check for wrinkles or slack after installation, retension if needed.
How to ensure frame squareness and stability?
Use a carpenter’s square to verify 90-degree angles at each corner before securing joints. Diagonal measurements from corner to corner should match within 1/8 inch. Anchor the frame to the floor or wall studs to prevent shifting. For PVC or aluminum frames, add cross-bracing in the middle to reduce flex.
What are risks of unprotected metal poles?
Exposed metal poles can dent clubs or injure players during follow-through. Cover poles with foam pipe insulation or pool noodles to soften impact. Ensure padding extends at least 6 feet from the floor to protect against low swings. Check padding regularly for tears or compression, replace if it no longer absorbs impact.
Final Thoughts
Building a DIY golf simulator enclosure saves money but comes with challenges, poor measurements, weak frame joints, and screen tension issues among the most common. We found that most problems start before assembly begins: skipping the room scan, choosing undersized materials, or ignoring ceiling height. A solid plan with exact dimensions and a material list prevents costly rework later.
During assembly, small mistakes add up. Misaligned frames create uneven screens, while loose bolts lead to wobbly structures. We recommend checking each connection with a level before tightening fully and using corner braces for extra stability. The right tools, impact driver, clamps, and a laser measure, make the process faster and more precise.
If you’re ready to start, measure your space twice and cut once. Gather all tools and materials before building, and follow the step-by-step guide to avoid mid-project fixes. For more help, check our golf simulator room size guide or read about screen material options. A well-built enclosure lasts for years, take the time to do it right the first time.