Building your own DIY golf simulator enclosure can be an exciting and rewarding project for any golf enthusiast. Constructing a customized space to house your golf simulator unlocks a wide range of benefits compared to purchasing a pre-fabricated enclosure.
In this comprehensive guide, you’ll learn everything you need to know about building your own do-it-yourself golf simulator enclosure. We’ll walk through step-by-step instructions, required tools and materials, planning considerations, common pitfalls to avoid, and tips to make your enclosure build a success.
Let’s get started on planning and building your dream enclosure, so you can spend more time perfecting your swing.
Overview and Benefits of a DIY Enclosure
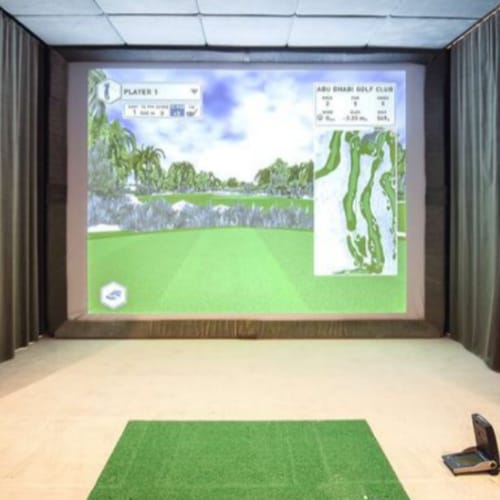
Golf simulator enclosures are structures built around commercial or home golf simulators to enhance the simulation experience. Enclosures block out external distractions, contain shots within the space, and allow control over lighting and climate. They transform any open room into a dedicated golf practice and entertainment space.
Opting to build it yourself rather than buying a pre-made enclosure offers many advantages:
- Cost savings – DIY builds can reduce costs by 40% or more compared to commercial enclosures
- Customization – Tailor the enclosure design, layout and materials completely to your space
- Higher quality – Control workmanship and use higher-grade materials
- Satisfaction – Take pride in constructing your own high-tech man cave
Planning Your Enclosure
Careful planning is key to building your dream simulator enclosure. Consider the following key factors during design:
- Size – Account for swing radius, room for stance and screen size. At least 12′ x 12′ is recommended (more is preferable).
- Layout – Optimize the structure for your swing path, viewing angles and door access.
- Materials – Pick framing, walls, and flooring that are durable and fit your budget.
- Functionality – Incorporate ventilation, cooling, lighting, and other needs.
Be sure to precisely measure your available space and map the enclosure footprint. Crucial elements like ceiling height, impact areas, and optimal screen position will influence the layout. Thoughtful planning from the start will help prevent costly changes down the road.
For those who prefer not to delve into a DIY project, consider exploring our guide on golf simulator enclosures and screens. This guide provides expert recommendations to help you choose the best materials and features for your setup without the hassle of building it yourself.
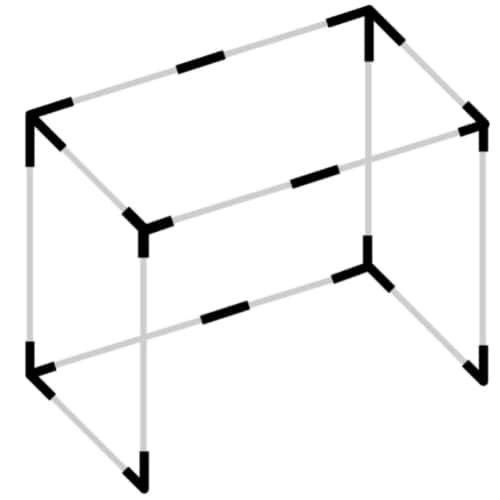
Structural Frame and Base
The structural framework that forms the skeleton of your DIY golf simulator enclosure is a crucial part of the build. This base frame must be strong, square, and level to support walls, roofing, impact forces, and enclosure components safely.
Frame and Base Materials
When selecting framing materials, consider the following:
Wood is Versatile and easy to work with. You can use 2×4 or 2×6 boards for minimum deflection.
Steel is a very strong building material, but it requires welding skills. Steel tubing or C-channels are good options. Remember to paint the frame to avoid corrosion.
Aluminum is another very popular material. It is lightweight while still sturdy. Extruded frames resist corrosion, making aluminum an excellent choice to build your frame.
The base flooring also impacts durability. Wood or composite decking provides a nice surface while remaining budget-friendly.
Constructing the Frame
Follow these steps to assemble a square, level frame:
- Start by cutting boards, tubes, or channels to the required lengths.
- Arrange the bottom plates in a rectangle per enclosure dimensions
- Attach vertical posts to plates using screws, bolts, or welds
- Add horizontal cross-members to ensure rigidity
- Check diagonals to square up the frame before securing it any further
- Use a level on all sides to ensure the base is flat and even
Take time to properly construct the frame, as this backbone cannot be easily tweaked later.
Adding Ceiling and Side Supports
Build a roof structure to attach the ceiling paneling to using rafters or trusses. Sturdy plywood kick plates on the sides will help maintain structural integrity and withstand golf ball impacts.
After that, reinforce vital joints with gussets. Check the structure for any frame alignment issues and address them promptly before moving on.
With a solid frame erected, you’ve completed the first major step of your DIY golf simulator build. Moving forward, this base will support the remaining enclosure components.
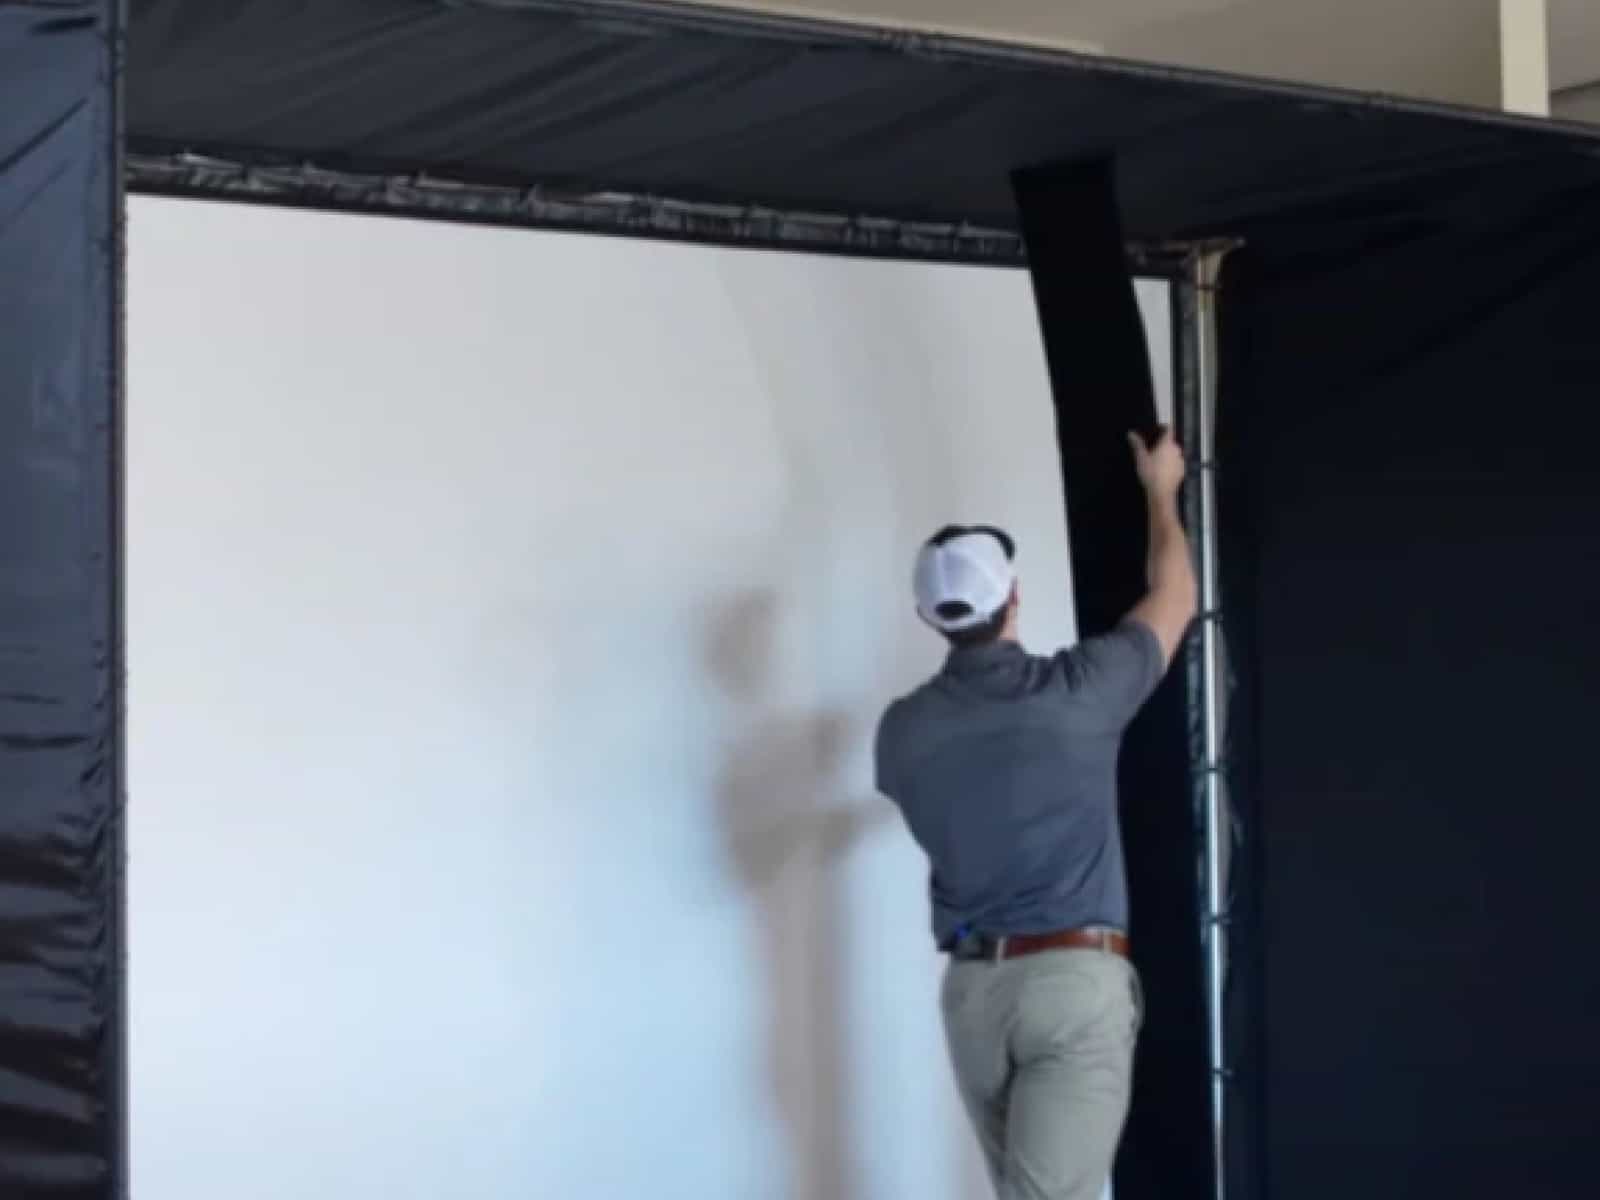
Walls, Doors and Aesthetics
Once the structural framework is complete, the real visual transformation begins as you add walls, doors, and finishing touches to your DIY golf simulator enclosure.
Wall Paneling Material Options
Picking the right materials for your simulator walls is key to achieving the look, durability, and functionality you want. Some top options to consider are as follows:
Drywall
The smooth finished surface of drywall makes it a popular wall covering that can be easily painted. Use moisture and mold-resistant drywall panels to handle the humidity in a simulator space. However, drywall alone provides little protection from club impacts.
Plywood
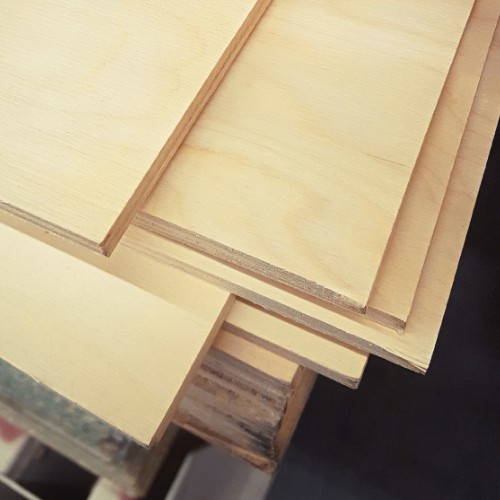
Whether you choose common CDX plywood or attractive bamboo or cedar varieties, plywood makes a cost-effective and damage-resistant simulator wall surface.
You might paint or wallpaper the plywood to achieve any desired look that you have in mind.
Ballistic Panel Netting
You can use special ultra-high-strength netting designed for containing golf shots. This will provide better ball containment with an open-air look.
Turf

For the ultimate realistic golf experience, cover walls in artificial turf materials. Turf walls absorb impact and limit ball bounce for safety. They may also limit the noise generated by golf ball impacts with clubs and the screen.
Other Materials & Considerations
Metal sheets, HDPE panels, and recycled rubber can also be used, depending on your priorities and needs. Also, evaluate acoustics – materials like mass-loaded vinyl reduce simulator noise. Check local fire codes when selecting interior wall finishes as well.
Doors and Access Points
Door size, opening direction and hardware need careful planning to accommodate people entering with golf clubs. Typical minimum dimensions are 36″ wide by 80″ high. Out-swinging doors are preferred for added safety.
Remember to cut openings in the walls to add windows, ventilation grilles, or pass-throughs as desired. Preferably, use additional framing and trim to give all walls and openings a neat, finished look.
Heavy-duty lever handles and spring hinges are recommended, as these make entries seamless.
Aesthetics and Finishing Touches
Personalizing your DIY simulator space is rewarding. It is the actual reason you started this whole adventure in the first place. Here are some ideas to make your enclosure look polished:
- Paint the walls or ceiling a bold accent color to make it pop. If you decide to cover the walls with turf, you might want to use special turf paints.
- Install rubber sports flooring or luxury vinyl plank floors to handle heavy use and moisture.
- Customize and personalize the enclosure by adding custom logo mats, sports memorabilia displays, framed prints, golf-themed lighting, and other decorator touches to finish things off.
With creative design choices, you can build a personalized golf sanctuary that reflects your passion and style. The possibilities are endless!
Wiring, Electronics, and Safety
Properly installing power, lighting, climate control, and safety features ensures your DIY golf simulator enclosure operates smoothly and safely for years to come.
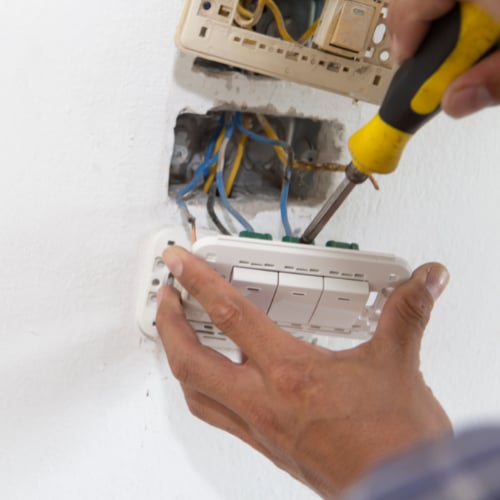
Power, Lighting and AV Installation
Running heavy gauge electrical wiring and installing ample lighting, switches, and outlets provides the necessary electricity throughout your enclosure. Consider installing a dedicated circuit just for the simulator to provide clean, stable power for sensitive electronics.
Surge protectors and UPS battery backups are also good ideas to further protect computers and AV components from voltage spikes, brownouts, or brief power outages.
Carefully routing cables in conduit and tracks keeps the launch monitor, projector, speaker, and computer wiring neatly organized and out of the way. Follow all electrical codes and use GFCI outlets when installing wiring within the enclosed simulator space. Proper lighting like recessed LED fixtures creates ideal visibility for using your simulator without shadows or glare.
Ventilation and Climate Control
Maintaining comfortable temperature and humidity levels in your simulator space improves performance and enjoyment. Mini-split air conditioners or portable AC units work well for cooling and dehumidifying the enclosed area.
Make sure to size the AC capacity appropriately – factors like sunlight, insulation, and occupancy impact load. Fresh airflow is also important, so add exhaust fans and intake vents to continually cycle the air. Insulating walls and ceilings also helps regulate interior climate by preventing heat/cooling loss.
With proper climate control, your simulator space stays pleasant year-round.
Safety Considerations
Safety should also be a top priority when finishing your DIY golf enclosure. Ensure easy emergency egress by using panic bar hardware on the doors – this allows anyone inside to immediately push the door open.

Install fire/CO detectors, alarms, and an ABC fire extinguisher. Post an illuminated exit sign over the door for further visibility.
Additionally, Padding hard surfaces with turf or rubber mats helps prevent injury and damage from errant golf shots. Securely mounting impact screens and nets protects users from ball strikes.
Taking time to properly install safety measures provides peace of mind and prevents issues down the road.
Final Steps
After all the hard work building your customized DIY golf simulator enclosure, it’s time to put the finishing touches on it and start enjoying your creation.
Final Inspector Walkthrough

Before using the enclosure, it’s important to have a final inspection done, especially if permits were required. Verify that the structure meets the framing and materials codes, that electrical wiring and fixtures are up to code and that necessary ventilation and fire/safety systems are in place.
Make any final tweaks needed to pass the inspection and get your permit signed off.
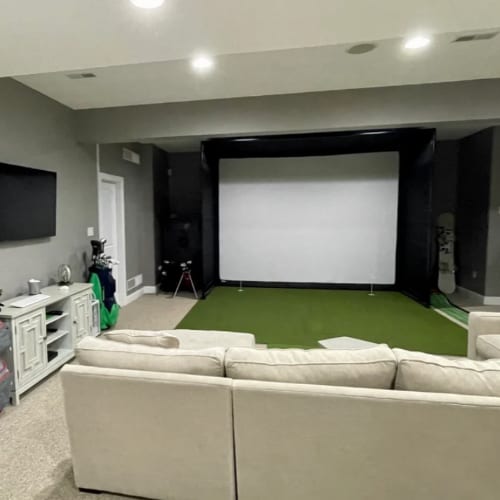
Enjoy Your New Simulator Space
Now the fun part begins. Outfit your enclosure with a golf simulator system and start playing. Personalize the space with hitting mats, sports memorabilia, decor items, furniture, and accessories. Dial in the lighting and climate controls to create an ideal environment.
Run through the simulator calibration and settings. Invite some friends over to test it out and show off your work. With routine maintenance, your DIY golf simulator enclosure will provide enjoyment for many years to come.
Congratulations on completing this ambitious project – you now have a customized high-tech golf sanctuary to play in year-round and enjoy for years to come!
Frequently Asked Questions
It’s now time to provide answers to some of the most widely asked questions concerning DIY golf sim enclosures. These answers will help you be better prepared for this amazing adventure.
How deep should a golf simulator enclosure be?
When planning a home golf simulator enclosure, an ideal depth is around 18 feet.
Having at least 18 feet of depth allows executing full, unrestricted golf swings with all clubs. This accounts for a large backswing, follow-through, and sufficient ball flight distance before reaching the screen. A depth of 14-15 feet may work but could result in some longer clubs making contact with rear walls on full swings. While extra depth beyond 18 feet provides even more room, it demands a larger overall space.
Is 12′ wide enough for a golf simulator?
For most golf simulator setups, a width of 12 feet should provide sufficient space for comfortable swinging. Having at least 10-12 feet of width allows adequate room to take a full backswing and follow through.
However, if both right-handed and left-handed golfers use the simulator, more width is preferred to accommodate different stance alignments. In that case, a minimum of 15 feet total width would be better to prevent anyone from feeling cramped.
How much space do you need behind a golf simulator screen?
When setting up a golf simulator, allow at least 1 foot of space directly behind the screen surface to avoid contact on full swings and follow-throughs. Also, budget 3 inches of buffer space on the left and right sides of the enclosure.
Final Thoughts
A golf enclosure serves as the foundation of any home golf simulator setup. With the right enclosure frame, you can bring together all the components—launch monitor, impact screen, and more—to create your dream virtual golf experience.
Though every golfer’s needs differ, a DIY golf sim enclosure allows endless customization. Adjust lighting, add side netting, or incorporate other upgrades to match your space and swing.
We invite you, the reader, to share your enclosure wisdom in the comments below. What lessons have you learned in sourcing, building, and optimizing your own golf simulator enclosure?
Thanks for reading!